The canvas
A canvas has three regions:
- Left sidebar (⌘ B): the canvas’s layers, its groups, frames and documents.
- The canvas itself: an infinite surface of frames and documents, with the toolbar at the bottom center.
- Agent panel (⌘ I): the Coordinator, or chat and terminals for the selected chat. Its Chats button lists every chat (see The Chats menu).
The shortcuts hide and show the side panels. While one is hidden, Show sidebar at the top left or Show chat at the top right brings it back.
⌘ . hides both panels at once, or brings them back. Drag a panel’s edge to resize it; the layout is remembered.
Moving around
The zoom percentage at the top right opens the zoom menu: Zoom in, Zoom out, Zoom to fit, Zoom to 50%, Zoom to 100%, Zoom to 200%, and Keyboard shortcuts (also ?). Your viewport is saved with the canvas, so you come back to where you left off.
The top bar
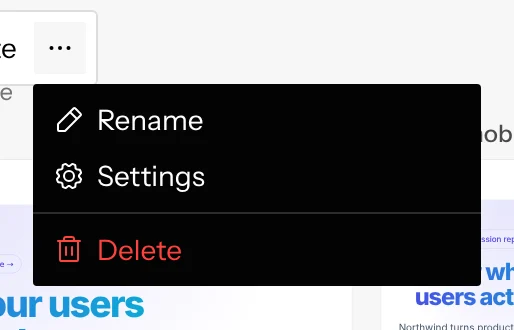
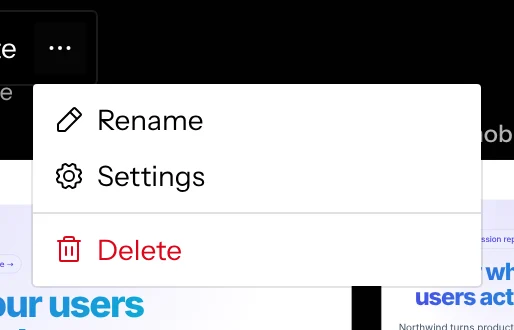
The pill at the top left shows where the canvas lives: All files or its folder, then the canvas name. Double-click the name to rename it. The … menu has Rename, Settings (the canvas’s repositories, memory, files and skills) and Delete. On a canvas shared with you, only the owner can rename it, so the menu has Settings and Leave.
The top right holds the zoom menu. On the hosted app it also shows the comment count, who else is here, and Share. See Sharing & collaboration.
Tools
The toolbar at the bottom holds the drawing tools. Exactly one is active at a time. Pressing a tool’s key again returns to Select.
While the Frame or Document tool is active, every group shows a dashed + slot at its end. Click it to add the new layer to that group. Adding a layer, by clicking, dragging or using a slot, selects it and returns to Select.


Selecting
- Click a layer’s title bar to select it. Shift-click adds to or removes from the selection.
- Drag on empty canvas to draw a selection marquee.
- Clicking a group’s label selects the whole group.
- Delete or Backspace deletes the selection, and the next layer is selected so you can keep going.
- ⌘ D duplicates the selected frames and mockups, adding each copy at the end of its group and selecting the copies.
- With more than one thing selected, groups included, toolbars and menus hide so nothing acts on just one of them.
- Esc backs out one step at a time: it closes whatever is open (editing, a tool, interact mode), then clears the selection.
Layer menus
Each frame, mockup, document and group has one menu, and it’s the same wherever you open it: … on its row in the layers list, … at the end of the toolbar under a selected frame or mockup, or … after the name of a selected document or group. Its tooltip names the object: Frame options, Mockup options, Document options, Group options. It holds, as they apply:
- Rename and Duplicate (frames and mockups).
- Device size and Fit to content (frames and mockups).
- A frame’s Chat submenu with its chat menu.
- Delete.
Groups
Layers on the canvas always live in groups: rows of frames, documents and mockups laid out left to right with an even gap. Groups keep related screens together, such as a page’s desktop and mobile versions or the steps of a signup flow.
- Move a group by dragging any member’s title bar or the group label. Edges and centers snap to nearby groups, with guide lines.
- Merge groups by dragging one group onto the end of another; the target lights up. Hold ⌘ to move without merging.
- Reorder within a group by selecting the group, then dragging a member along the row. Hold ⌘ while dragging to pull it out into a new group.
- Change spacing by selecting the group and dragging the handles between members.
- Rename a group by double-clicking its label, or from its … menu in the sidebar.
A group disappears when its last member is removed.
A group’s chat
When every frame in a group shows the same chat, as the screens of one flow do, the group names it after the group’s name: its state icon (a spinner while it sets up, moving dots while its agent works), its title, and its pull request when there’s room. Its frames leave the chat off their own titles; to show one of them from another chat, hover the frame’s name and click Choose chat after it.
When the frames show different chats, as parallel explorations do, the group names none, and each frame’s title ends with its own chat. Switching one frame to another chat turns a flow into such a group; switching it back turns it into a flow again. To put every frame in such a group on one chat, hover the group’s name and click Choose chat after it. A group with a single frame has no group label, so that frame’s title names the chat instead.
To show a flow from another chat, click the group’s chat and pick one from the list (for a group named Checkout, it reads Show Checkout from…). Every frame in the group moves, each keeping its route, state and size. Documents in the group are unaffected. The switch is one undo step, and everyone on the canvas sees it at once.
A group whose frames have no chat yet shows Choose a chat after its name instead, and its frames show No chat, with Start a chat to build something new in them, until you pick. Picking one sets the group and all of its frames. Once some frames have a chat and others don’t, each frame offers its own list. A group of documents only has no chat: when its last frame is moved out, split off or deleted, the group drops its chat, and the next frame to join sets it.
The layers list
The sidebar’s layer list mirrors the canvas. Groups with several members appear as folders. A flow’s row ends with its chat (state icon and title, with its pull request at the row’s end), and its frame rows show just their names. In a group whose frames differ, and in single-frame groups, each frame row ends with its own chat instead.
- Click to select; Shift-click to add to the selection.
- Double-click to zoom to it.
- Drag rows to reorder, move a layer into another group, or drop it between groups to start a new one.
- … opens the layer’s menu, the same one as on the canvas. A delete happens at once; ⌘ Z brings it back.
Undo
⌘ Z and ⌘ ⇧ Z undo and redo your own canvas changes: moving, resizing, adding, deleting and renaming frames, documents and groups. A frame’s page, its route and scroll, isn’t part of undo. Your ⌘Z never undoes someone else’s changes or the Coordinator’s.
Deleting a frame, document or group happens at once, whether from the layers list, the frame toolbar or the Delete key, with no confirm and no toast; ⌘ Z brings it back. Everyone on the canvas sees the delete, and the undo. Deleting a chat or a repository still asks first, because undo can’t bring those back.
Undo covers the canvas layout only. It doesn’t touch code: to reverse something the agent changed, ask it, or use git.